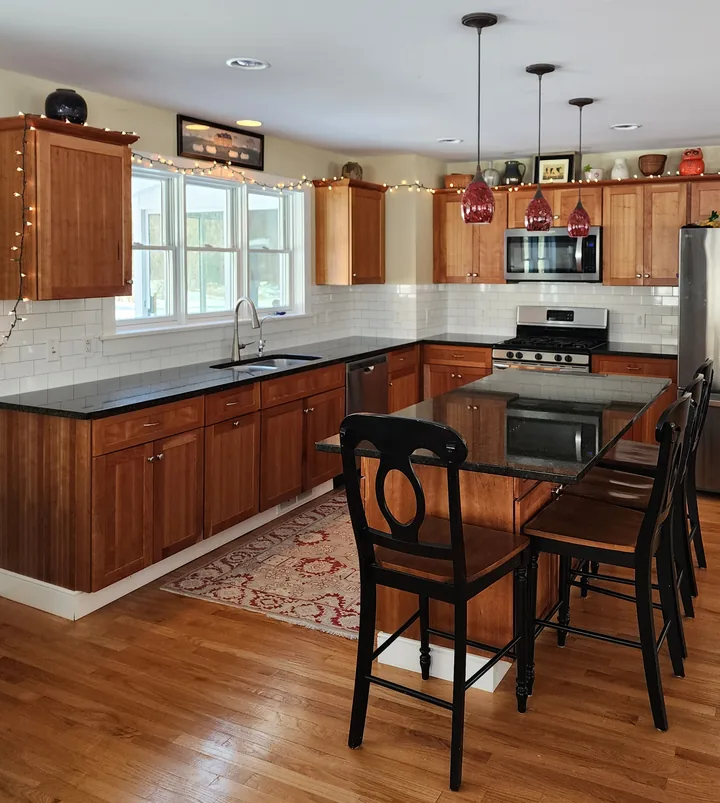
A backsplash may cover less area than a floor or shower, yet small interruptions can make the layout more demanding. Outlets, windows, corners, cabinet ends, a range opening, and an exposed edge all affect where the pattern begins and how it finishes.
Start with what will stay in the room
Identify the final countertop, cabinets, range or cooktop, hood, window trim, and any open wall ends. If cabinets or countertops are changing, mention that early. Their final position defines the visible backsplash field and can affect measurements, edge details, and the way courses align.
Decide which walls belong to the backsplash. Some kitchens have one clear run; others turn a corner, continue around a window, or stop at a cabinet edge. A wide photo of every wall is more helpful than a single close-up because it shows how those decisions connect.
Where should the tile begin and end when a cabinet, counter, or wall does not provide an obvious boundary?
Look at tile, pattern, and grout together
Bring home a sample if you can and view it against the counter, cabinets, paint, and room lighting. Inspect several pieces rather than assuming every tile is identical. Manufactured and handmade-look tiles can vary in dimensions, surface, color, and edge character.
The tile format and pattern influence cuts, starting points, and the visual rhythm across the wall. Grout joint width should respond to the tile’s actual size variation and the material manufacturer’s directions; there is no single joint width that is right for every tile. Grout color can make the pattern quieter or more graphic, so it is best considered before the field is installed.
- Save the product name or a photo of the box label.
- Note the tile size and whether sheets, trim, or matching edge pieces are available.
- Share the pattern you prefer, including any focal area behind a range.
- Keep the grout color undecided if you want to compare it in the room.
Make the interruptions part of the layout
Outlets and switches are not afterthoughts. Their location, cover-plate size, and relationship to grout joints affect the cuts around them. The same is true at inside corners, outside corners, windows, shelves, range areas, and open tile edges.
A thoughtful layout balances the full wall instead of solving each obstruction separately. Small cuts cannot always be avoided, but looking at the entire run makes it possible to compare starting points and decide where visual compromises are least noticeable.
Edges deserve an explicit decision
Where tile stops in the open, the finish may involve a trim profile, a compatible tile edge, or another detail suited to the material and room. Ask what is available for the tile you are considering rather than assuming a matching piece exists.
Show the wall as it is now
Tile needs a suitable supporting surface. The right preparation depends on whether the wall is painted drywall, patched, damaged, uneven, covered by an existing finish, or affected by moisture or grease. A sound, clean, suitably flat surface matters because the finished tile follows the plane beneath it.
Do not hide a soft area, old leak mark, loose patch, or uneven transition just to make the photo look cleaner. Those details help David understand what may need closer review before installation. Surface preparation is part of the scope discussion, not a homeowner test you need to pass before reaching out.
What to send David for a useful first conversation
- Your town or ZIP. This confirms where the project is located.
- One wide photo of each backsplash wall. Include counters, upper cabinets, windows, and appliances where possible.
- Close photos of the complicated areas. Show outlets, corners, open ends, wall damage, and transitions.
- Approximate dimensions. Wall length and the distance from counter to cabinet help establish scale; they do not need to be presented as final measurements.
- The tile or inspiration. Send a sample photo, product link, box label, or pattern reference, and say what remains undecided.
David personally discusses and installs each project, so the details in the first text remain part of the same owner-to-homeowner conversation.
Kitchen backsplash questions
Should I contact David before buying tile?
Yes, if you would find an early layout conversation useful. You can also reach out after selecting tile. In either case, share the product details and what is still undecided.
Do countertops and cabinets need to be finished first?
If they are being replaced, their final position should be part of the plan before measurements and layout are treated as final. Tell David what work is complete and what is still scheduled.
Can a backsplash go over the existing finish?
That depends on the existing material, bond, flatness, condition, added thickness, and edge details. Send photos instead of assuming the existing surface can stay.